Featured

  • Newsflash 2

    The one thing about a Web site, it always changes! Joomla! makes it easy to add Articles, content,...

  • Newsflash 1

    Joomla! makes it easy to launch a Web site of any kind. Whether you want a brochure site or you are...

  • Newsflash 3

    With a library of thousands of free Extensions, you can add what you need as your site grows. Don't...

  • Newsflash 5

    Joomla! 1.5 - 'Experience the Freedom'!. It has never been easier to create your own dynamic Web...

  • Newsflash 5

    Joomla! 1.5 - 'Experience the Freedom'!. It has never been easier to create your own dynamic Web...

  • Newsflash 5

    Joomla! 1.5 - 'Experience the Freedom'!. It has never been easier to create your own dynamic Web...

  • NewsFlash 1

    20.01.2010 - In id, mauris viverra asperiores, bibendum in id. Eu molestie. Ac sit eu...
  • NewsFlash 2

    20.01.2010 -In id, mauris viverra asperiores, bibendum in id. Eu molestie. Ac sit eu. ..
  • NewsFlash 3

    20.01.2010 - In id, mauris viverra asperiores, bibendum in id. Eu molestie. Ac sit eu. ..
  • NewsFlash 4

    20.01.2010 - In id, mauris viverra asperiores, bibendum in id. Eu molestie. Ac sit eu. ..
  • NewsFlash 5

    20.01.2010 -In id, mauris viverra asperiores, bibendum in id. Eu molestie. Ac sit eu. ..
  • NewsFlash 6

    20.01.2010 - In id, mauris viverra asperiores, bibendum in id. Eu molestie. Ac sit eu. ..
Showing posts with label Bloger Tutotial. Show all posts

0 Hide one of sidebar widgets in homepage blogger

Previously, we have discussed the trick to remove the post widget in homepage in blogger. Apparently, there is a new question similar to the question, i.e. “what if it is the one of sidebar widget that we try to hide, so the sidebar widget will not appear in the homepage, but it appears in the single posts”.
Can it be? The answer is yes, and it’s easy and simple to do that. Such a trick is usually done to make a blog look more attractive and is assumed to be more interesting than ever.
Before we enter the tutorial to hide one of sidebar widgets in homepage, we had better equate the perception about the terms that Kang Rohman uses, i.e. Homepage and Single Post.
Homepage here means the front page of a blog, e.g. Kang Rohman has a blog with the homepage address as http://www.blogspottutorial.com. You can see this address at your browser address bar.
home page
Single Post is the full page of an article. It is when you read an article fully, i.e. by clicking the title of the article or if the blog uses “read more function”, you can click the words “read more”. The address of a single post is the combination of homepage address and the title of the article. Below is one sample of Single Post URL.
single-post
Well, now you should’ve got it, so let’s go to the point.
The first step you have to do is to identify the sidebar widget that you want to remove in the homepage. You can use a method, i.e. by knowing the title of the sidebar widget. Do the following instructions.

Knowing Sidebar Widget from its title

The easy way to know the sidebar widget to remove from the homepage, in my opinion, is from the sidebar title. From that, we will know the ID of the widget. Follow the steps below.
  • Please login to blogger with your ID
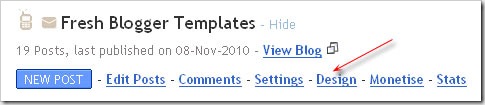
  • Click Design. design in blogger
  • Click Edit HTML. edit html in blogger
  • Find the code similar to: <b:widget id='HTML14' locked='false' title='Tutorials For Beginner' type='HTML'/>
    <b:widget id='HTML11' locked='false' title='Blogger Templates Gallery' type='HTML'/>
    <b:widget id='HTML4' locked='false' title='Latest Free templates' type='HTML'/>
  • Every blog may have the different code, so Kang Rohman writes “similar”. Copy and then paste the above code on notepad or the like.
From the above illustration, Kang Rohman’s blog has three widgets, and the important things you should pay attention are the texts printed in red and orange, i.e.:
  • HTML14   -   Tutorials For Beginner
  • HTML11   -   Blogger Templates Gallery
  • HTML4     -   Latest Free templates
The red-printed texts are the IDs of the sidebar widgets and the orange-printed texts are the titles of the sidebar widgets. Now we have known the IDs of the sidebar widgets and then we will choose which widgets that will disappear from the homepage, but will appear in the single post page.
In order not to make this tutorial come to a dead-end, we will see the following explanations of the IDs:
HTML14
Since it is an ID, in the CSS code, we will need the sign ( # ) to place in front of it, so it will be like this:
#HTML14
Creating the CSS code
The CSS code to mask or hide an ID in a web page is as below:
#ID {display:none}
For above ID, i.e. #HTML14, then the code would be like this:
#HTML14{display:none}
The above CSS code is to hide the widget permanently, while we want the widget to disappear in the homepage and appear in the single post. For this purpose, we can use the “If Condition function” in blogger.

CSS function using If Condition

The method we will use in this tutorial is the CSS with the If Condition function. The code to display a sidebar widget only in the single post is as below:
<style type='text/css'>
<b:if cond='data:blog.pageType != &quot;item&quot;'>
#ID{display:none}
</b:if>
</style>
For this tutorial, we have used #HTML14 (only example), so the code would be like this:
<style type='text/css'>
<b:if cond='data:blog.pageType != &quot;item&quot;'>
#HTML14{display:none}
</b:if>
</style>
Where do we place the code? We can place it below the code ]]></b:skin> or above the code </head>
Still confused? Just follow the steps below to place the code:
  • Please login to blogger with your ID
  • Click Design
  • Click Edit HTML.
  • Find the code ]]></b:skin>
  • Copy and then paste the code below, exactly below the code ]]></b:skin> (Remember the ID here should be replaced with your own!) 
<style type='text/css'>
<b:if cond='data:blog.pageType != &quot;item&quot;'>
#ID{display:none}
</b:if>
</style>
  • Click SAVE TEMPLATE.
  • Done. See the result.
From the long tutorial you have been reading from the beginning until here, the bottom line is only to install the CSS code using if condition, nothing else

However, perhaps you are wondering the reverse thing from above tutorial, i.e. how to display a sidebar widget only in the homepage, not in the single posts.
It’s very simple to solve this. Just pay attention the following code:
<style type='text/css'>
<b:if cond='data:blog.pageType != &quot;item&quot;'>
#ID{display:none}
</b:if>
</style> 
So, you only need to replace the exclamation mark ( ! ) that is printed in red with the equal sign ( = ), and then the function of the code will be in reverse.

<style type='text/css'>
<b:if cond='data:blog.pageType == &quot;item&quot;'>
#ID{display:none}
</b:if>
</style>
That’s all! ) GL everyone
Read more

0 5 Ways to Gather Fans on Facebook

We all know that Facebook is the hottest fad right now. Is it going to be around in 5 years? You never know because I look at how fast Myspace took a tumble. This doesn’t mean that Facebook won’t follow,   but the point here is that you market where the people are and today, it is definitely a place like Facebook.
I don’t care what kind of business you run online or offline, there are people out there that want to check out your products, as well as become a fan. As long as you’re offering something of value, you can gather up fans on your fan page via Facebook. This is a fantastic way to promote to people.
Below are some tips that you can follow when you’re looking to gather up some fans with your Facebook page. The more fans you get, the better it’s going to be for your business because not only can you reach out to them all the time, you can keep them up to date on what’s happening in your world.
  1. Offer something worth value: No one wants to join a spammy looking site. If you’re in it just for the money, you’re probably not going to get a lot of people to join. Create something of value and the people should come. 
  2. Advertise via Facebook: I gathered up a lot of fans via the Facebook ads. Instead of advertising my site URL, I decided to advertise my fan page. I would target those that would be interested in the product. You’re going to want to tweak your ads and find the one that fits.
  3. Put a widget on your site: The best thing that I did was put a “like” widget on my site. Right away, I gathered about 100 fans. Today, I consistently net around 20-30 fans per week. As more people join, you’re going to find that their friends will see your fan page in their recommendations box. 
  4. Ask friends and family: Be careful with this one because you don’t want to spam your friends and family on your personal account, but every couple months, just let them know about your Facebook page and tell them how much you would appreciate it if they joined 
  5. Create a contest: People eat up contests and if you hold one that is worth joining, you’re going to find that you’re going to get fans galore. It’s a great way to gather up new fans and as long as your contest isn’t extravagant, you should get a nice return on your investment.
I’ve found the fan pages to be more like a snowball. The more fans you gather, the more that will come. It’s going to take time, so don’t expect 200,000 fans over night. Once you do get a nice fan base, be sure to follow the Facebook TOS because you may find that if you post affiliate links, or something they don’t like, they can shut you down in an instance.
Read more

0 Make a Slide Like Kompas.com at Blogspot


how do you think? interesting? yea I know it look more professional instead, right?. so how to install it on your blog? easy just follow my instruction
  • Go to Design ► Edit HMTL 
  • Download Full Template ( recomended )
  • Then look for the code </ head> (by way of CTRL + F then type in the code)


  • now replace the code </ head> with the script below

<script type='text/javascript'>
//<![CDATA[
//** Tab Content script v2.0- © Dynamic Drive DHTML code library (http://www.dynamicdrive.com)
//** Updated Oct 7th, 07 to version 2.0. Contains numerous improvements:
// -Added Auto Mode: Script auto rotates the tabs based on an interval, until a tab is explicitly selected
// -Ability to expand/contract arbitrary DIVs on the page as the tabbed content is expanded/ contracted
// -Ability to dynamically select a tab either based on its position within its peers, or its ID attribute (give the target tab one 1st)
// -Ability to set where the CSS classname "selected" get assigned- either to the target tab's link ("A"), or its parent container
//** Updated Feb 18th, 08 to version 2.1: Adds a "tabinstance.cycleit(dir)" method to cycle forward or backward between tabs dynamically
//** Updated April 8th, 08 to version 2.2: Adds support for expanding a tab using a URL parameter (ie: http://mysite.com/tabcontent.htm?tabinterfaceid=0)

////NO NEED TO EDIT BELOW////////////////////////

function ddtabcontent(tabinterfaceid){
this.tabinterfaceid=tabinterfaceid //ID of Tab Menu main container
this.tabs=document.getElementById(tabinterfaceid).getElementsByTagName("a") //Get all tab links within container
this.enabletabpersistence=true
this.hottabspositions=[] //Array to store position of tabs that have a "rel" attr defined, relative to all tab links, within container
this.currentTabIndex=0 //Index of currently selected hot tab (tab with sub content) within hottabspositions[] array
this.subcontentids=[] //Array to store ids of the sub contents ("rel" attr values)
this.revcontentids=[] //Array to store ids of arbitrary contents to expand/contact as well ("rev" attr values)
this.selectedClassTarget="link" //keyword to indicate which target element to assign "selected" CSS class ("linkparent" or "link")
}

ddtabcontent.getCookie=function(Name){
var re=new RegExp(Name+"=[^;]+", "i"); //construct RE to search for target name/value pair
if (document.cookie.match(re)) //if cookie found
return document.cookie.match(re)[0].split("=")[1] //return its value
return ""
}

ddtabcontent.setCookie=function(name, value){
document.cookie = name+"="+value+";path=/" //cookie value is domain wide (path=/)
}

ddtabcontent.prototype={

expandit:function(tabid_or_position){ //PUBLIC function to select a tab either by its ID or position(int) within its peers
this.cancelautorun() //stop auto cycling of tabs (if running)
var tabref=""
try{
if (typeof tabid_or_position=="string" && document.getElementById(tabid_or_position).getAttribute("rel")) //if specified tab contains "rel" attr
tabref=document.getElementById(tabid_or_position)
else if (parseInt(tabid_or_position)!=NaN && this.tabs[tabid_or_position].getAttribute("rel")) //if specified tab contains "rel" attr
tabref=this.tabs[tabid_or_position]
}
catch(err){alert("Invalid Tab ID or position entered!")}
if (tabref!="") //if a valid tab is found based on function parameter
this.expandtab(tabref) //expand this tab
},

cycleit:function(dir, autorun){ //PUBLIC function to move foward or backwards through each hot tab (tabinstance.cycleit('foward/back') )
if (dir=="next"){
var currentTabIndex=(this.currentTabIndex<this.hottabspositions.length-1)? this.currentTabIndex+1 : 0
}
else if (dir=="prev"){
var currentTabIndex=(this.currentTabIndex>0)? this.currentTabIndex-1 : this.hottabspositions.length-1
}
if (typeof autorun=="undefined") //if cycleit() is being called by user, versus autorun() function
this.cancelautorun() //stop auto cycling of tabs (if running)
this.expandtab(this.tabs[this.hottabspositions[currentTabIndex]])
},

setpersist:function(bool){ //PUBLIC function to toggle persistence feature
this.enabletabpersistence=bool
},

setselectedClassTarget:function(objstr){ //PUBLIC function to set which target element to assign "selected" CSS class ("linkparent" or "link")
this.selectedClassTarget=objstr || "link"
},

getselectedClassTarget:function(tabref){ //Returns target element to assign "selected" CSS class to
return (this.selectedClassTarget==("linkparent".toLowerCase()))? tabref.parentNode : tabref
},

urlparamselect:function(tabinterfaceid){
var result=window.location.search.match(new RegExp(tabinterfaceid+"=(\d+)", "i")) //check for "?tabinterfaceid=2" in URL
return (result==null)? null : parseInt(RegExp.$1) //returns null or index, where index (int) is the selected tab's index
},

expandtab:function(tabref){
var subcontentid=tabref.getAttribute("rel") //Get id of subcontent to expand
//Get "rev" attr as a string of IDs in the format ",john,george,trey,etc," to easily search through
var associatedrevids=(tabref.getAttribute("rev"))? ","+tabref.getAttribute("rev").replace(/s+/, "")+"," : ""
this.expandsubcontent(subcontentid)
this.expandrevcontent(associatedrevids)
for (var i=0; i<this.tabs.length; i++){ //Loop through all tabs, and assign only the selected tab the CSS class "selected"
this.getselectedClassTarget(this.tabs[i]).className=(this.tabs[i].getAttribute("rel")==subcontentid)? "selected" : ""
}
if (this.enabletabpersistence) //if persistence enabled, save selected tab position(int) relative to its peers
ddtabcontent.setCookie(this.tabinterfaceid, tabref.tabposition)
this.setcurrenttabindex(tabref.tabposition) //remember position of selected tab within hottabspositions[] array
},

expandsubcontent:function(subcontentid){
for (var i=0; i<this.subcontentids.length; i++){
var subcontent=document.getElementById(this.subcontentids[i]) //cache current subcontent obj (in for loop)
subcontent.style.display=(subcontent.id==subcontentid)? "block" : "none" //"show" or hide sub content based on matching id attr value
}
},

expandrevcontent:function(associatedrevids){
var allrevids=this.revcontentids
for (var i=0; i<allrevids.length; i++){ //Loop through rev attributes for all tabs in this tab interface
//if any values stored within associatedrevids matches one within allrevids, expand that DIV, otherwise, contract it
document.getElementById(allrevids[i]).style.display=(associatedrevids.indexOf(","+allrevids[i]+",")!=-1)? "block" : "none"
}
},

setcurrenttabindex:function(tabposition){ //store current position of tab (within hottabspositions[] array)
for (var i=0; i<this.hottabspositions.length; i++){
if (tabposition==this.hottabspositions[i]){
this.currentTabIndex=i
break
}
}
},

autorun:function(){ //function to auto cycle through and select tabs based on a set interval
this.cycleit('next', true)
},

cancelautorun:function(){
if (typeof this.autoruntimer!="undefined")
clearInterval(this.autoruntimer)
},

init:function(automodeperiod){
var persistedtab=ddtabcontent.getCookie(this.tabinterfaceid) //get position of persisted tab (applicable if persistence is enabled)
var selectedtab=-1 //Currently selected tab index (-1 meaning none)
var selectedtabfromurl=this.urlparamselect(this.tabinterfaceid) //returns null or index from: tabcontent.htm?tabinterfaceid=index
this.automodeperiod=automodeperiod || 0
for (var i=0; i<this.tabs.length; i++){
this.tabs[i].tabposition=i //remember position of tab relative to its peers
if (this.tabs[i].getAttribute("rel")){
var tabinstance=this
this.hottabspositions[this.hottabspositions.length]=i //store position of "hot" tab ("rel" attr defined) relative to its peers
this.subcontentids[this.subcontentids.length]=this.tabs[i].getAttribute("rel") //store id of sub content ("rel" attr value)
this.tabs[i].onclick=function(){
tabinstance.expandtab(this)
tabinstance.cancelautorun() //stop auto cycling of tabs (if running)
return false
}
if (this.tabs[i].getAttribute("rev")){ //if "rev" attr defined, store each value within "rev" as an array element
this.revcontentids=this.revcontentids.concat(this.tabs[i].getAttribute("rev").split(/s*,s*/))
}
if (selectedtabfromurl==i || this.enabletabpersistence && selectedtab==-1 && parseInt(persistedtab)==i || !this.enabletabpersistence && selectedtab==-1 && this.getselectedClassTarget(this.tabs[i]).className=="selected"){
selectedtab=i //Selected tab index, if found
}
}
} //END for loop
if (selectedtab!=-1) //if a valid default selected tab index is found
this.expandtab(this.tabs[selectedtab]) //expand selected tab (either from URL parameter, persistent feature, or class="selected" class)
else //if no valid default selected index found
this.expandtab(this.tabs[this.hottabspositions[0]]) //Just select first tab that contains a "rel" attr
if (parseInt(this.automodeperiod)>500 && this.hottabspositions.length>1){
this.autoruntimer=setInterval(function(){tabinstance.autorun()}, this.automodeperiod)
}
} //END int() function

} //END Prototype assignment

//]]>
</script>

</head>

  • Next Find this code ]]></b:skin>
  • Replace that code with code CSS below

  • kemudian anda Ganti kode ]]></b:skin>  dengan kode CSS di bawah ini
 /* Start Slide*/
.img400{width:300px;height:250px;}.img400 img{width:297px;height:250px;border:2px solid#000;z-index:80;}.cursor{cursor:pointer;}.h250{height:250px;}.min250{margin-top:-250px;}.des_4{background:#000;padding:3px 8px;filter:alpha(opacity=80);-moz-opacity:.80;opacity:.80;width:80px;color:#F60;margin-bottom:2px;z-index:990;}.des_1{background:#000;height:57px;padding:3px 10px 0 10px;filter:alpha(opacity=75);-moz-opacity:.75;opacity:.75;z-index:990;}.des_1a{background:#000;height:50px;padding:10px 10px 0 10px;filter:alpha(opacity=75);-moz-opacity:.75;opacity:.75;margin-top:-60px;}.font16{font-size:13px;}.font16{font-size:14px;}.c_white{color:#FFF;}.c_white a{text-decoration:none;color:#FFF;}.c_white a:hover{text-decoration:underline;}.page_hl a{font:bold 12px arial;color:#FFF;text-decoration:none;padding:2px 5px;display:inline;background:#000000;filter:alpha(opacity=95);-moz-opacity:.95;opacity:.95;}.page_hl a:hover,.page_hl a.selected{color:#fff;text-decoration:none;background:#000;filter:alpha(opacity=60);-moz-opacity:.60;opacity:.60;}.page_hl span a{color:#FFF;text-decoration:none;background:#F30;filter:alpha(opacity=90);-moz-opacity:.90;opacity:.90;}.pd_5{padding:5px;}.clearit{clear:both;margin:0;padding:0;}.pb_10{padding-bottom:10px;}

]]></b:skin>

  •  
  • wait isnt over yet...Grrrr
  • Go to Design ► Page Elements 
  • select the sidebar you want to attach slide
  • Add Gadget ► HTML/JavaScript
Note : I recommend you have your sidebar width 300px and height 250px 
My SideBar


  • then you paste the code below
<div id="gal1" class="img400">
<div class="h250"><img alt="" src="https://blogger.googleusercontent.com/img/b/R29vZ2xl/AVvXsEg8fvv7aCbWC2yRzkok-26V8NTIUlnptt3TwgEUR-PyOntmQysjiF38zUjhmSw4Me3iXOkBWBEv9hAssUCQyvefu1KdOYWjyBT4IT5FqxV9daXaNoGAVVNUszih18ICk5UPN1vR-tgSnoU/s1600/1.jpg" /></div>
<div class="min250">
<div style="margin-top:168px;" class="des_4"><strong>HEADLINE</strong></div>
<div class="des_1 font16 c_white"><span class="font11 c_orange">PC Games</span><br /><a href="http://bendol-online.blogspot.com/2011/02/crysis-2-beta-2011-pc-game-mediafire.html"><strong>Crysis 2 Beta (2011)</strong></a>
</div>
</div>
</div><div id="gal2" style="display:none;" class="img400">
<div class="h250"><img alt="" src="https://blogger.googleusercontent.com/img/b/R29vZ2xl/AVvXsEjEZZWVyjb8hONt-zVbSFsdzwxQPi-pmf5jJ7ncUCug1WytCQTMD1V1DI1co0AurU6v-9LhTPxY_akg8DbGBfvnZeTJylbqTMhRqhqLRZ2Opl9H3iXllv2bsbioR60C5cSTDc3MVua_FDw/s1600/1.jpg" /></div>
<div class="min250">
<div style="margin-top:168px;" class="des_4"><strong>HEADLINE</strong></div>
<div class="des_1 font16 c_white"><span class="font11 c_orange">PC Games</span><br /><a href="http://bendol-online.blogspot.com/2011/02/test-drive-unlimited-2-2011-skidrow.html"><strong>Test Drive Unlimited 2</strong></a>
</div>
</div>
</div><div id="gal3" style="display:none;" class="img400">
<div class="h250"><img alt="" src="https://blogger.googleusercontent.com/img/b/R29vZ2xl/AVvXsEhU2xn5a8dcOJ9CsqGqp6n-kPR2hyphenhyphenngoX-ta4irga1DFmSf3k6aGzUlV5mitprV-Ahcse87Tscj042pLIcwFGZM7FSYgjkDEbWKMKQIS0qpCSNKoRO1GVMMclu4DnCnoLAINcTR0_x_kyI/s1600/1.jpg&cat=1&pid=2107&cache=false" /></div>
<div class="min250">
<div style="margin-top:168px;" class="des_4"><strong>HEADLINE</strong></div>
<div class="des_1 font16 c_white"><span class="font11 c_orange">PC Games</span><br /><a href="http://bendol-online.blogspot.com/2011/02/motogp-08-pc-games-mediafire.html"><strong>MotoGP 08</strong></a>
</div>
</div>
</div><div id="gal4" style="display:none;" class="img400">
<div class="h250"><img alt="" src="http://i56.tinypic.com/2jayk5y.jpg" /></div>
<div class="min250">
<div style="margin-top:168px;" class="des_4"><strong>HEADLINE</strong></div>
<div class="des_1 font16 c_white"><span class="font11 c_orange">PC Games</span><br /><a href="http://bendol-online.blogspot.com/2010/12/pes-pro-evolution-soccer-2011-reloaded.html"><strong>PES : 2011</strong></a>
</div>
</div>
</div><div id="gal5" style="display:none;" class="img400">
<div class="h250"><img alt="" src="https://blogger.googleusercontent.com/img/b/R29vZ2xl/AVvXsEgcsK6IgOxSZRYUSEnmxw_GWjwEri7sMQ0lU321kr1evWJC1INBehx-ox0pSZXF-UZHS50L11Bz1OEW3CUtIOjhlmxyPS3PctEkOx3JQqvTwU_d2ByKXn_khK3GOn4ECyZPdpgXlUgEPk8/s1600/aaa18682.jpg" /></div>
<div class="min250">
<div style="margin-top:168px;" class="des_4"><strong>HEADLINE</strong></div>
<div class="des_1 font16 c_white"><span class="font11 c_orange">PC Games (18+ ? LoL )</span><br /><a href="http://bendol-online.blogspot.com/2010/12/bully-scholarship-edition-procyon-pc.html"><strong>Bully: Scholarship</strong></a>
</div>
</div>
</div><div style="height:250px; margin-top:-250px;"><div id="galtabs" class="page_hl pd_5"><a href="#" rel="gal1">1</a> <a href="#" rel="gal2">2</a> <a href="#" rel="gal3">3</a> <a href="#" rel="gal4">4</a> <a href="#" rel="gal5">5</a> </div></div><div class="clearit"></div>
<div class="clearit pb_10"></div>
<script type="text/javascript">
var myheads=new ddtabcontent("galtabs");myheads.setpersist(false);myheads.setselectedClassTarget("link");myheads.init(5000)
</script>
Red : Picture ( For Slide 1,2,3,4 and 5 )
Blue : Link from the article
Pink : Title
  •  Done :D :x
  • if have problem let me know and i'll try to help ya :D
  • Enjoy
Read more

1 Add Animated Flash Clock To Your Blogger

 
Two most common widgets bloggers and webmasters put on their websites/blogs are a Clock and a Calendar. When searched on Internet for these free widgets, most probably the top two results in the list would be clocklink.com and worldtimeserver.com/index.aspx.this tutorial will show you how to Add animated flash clock gadget your blog. A clock gives a beautiful look to a website. A clock is a must for a personal homepage, forum, blog etc.Isn’t it exciting when you get a highly quality flash Clock absolutely Free? you can add this flash animated clock your blog easily. it's really faster and cool. all you have to do is follow the instructions given below.. let's go to work.and Congrats you!! I hope you like the clocks.


1.Login to your blogger Dashboard and go to Desing --> Page Elements.


2.Click on 'Add a Gadget' on the sidebar.


3.Select 'HTML/Javascript' and add the one of code given below


1. Clicking Digital Clock


<object><param name="movie" value="http://flash-clocks.com/free-flash-clocks-for-websites/free-flash-clock-33.swf"><embed src="http://flash-clocks.com/free-flash-clocks-for-websites/free-flash-clock-33.swf" width="150" height="150" wmode="transparent"> </embed></object>


2. Rotating Silver Clock


<object><param name="movie" value="http://flash-clocks.com/free-flash-clocks-for-websites/free-flash-clock-11.swf"><embed src="http://flash-clocks.com/free-flash-clocks-for-websites/free-flash-clock-11.swf" width="150" height="150" wmode="transparent"> </embed></object>


3. Black Outline Clock


<object><param name="movie" value="http://flash-clocks.com/free-flash-clocks-for-websites/free-flash-clock-24.swf"><embed src="http://flash-clocks.com/free-flash-clocks-for-websites/free-flash-clock-24.swf" width="150" height="150" wmode="transparent"> </embed></object>


4. Simple Clock


<object><param name="movie" value="http://flash-clocks.com/free-flash-clocks-for-websites/free-flash-clock-23.swf">
<embed src="http://flash-clocks.com/free-flash-clocks-for-websites/free-flash-clock-23.swf" width="150" height="150" wmode="transparent"> </embed></object>


5. White Clock


<embed src=http://flash-clocks.com/free-flash-clocks-blog-topics/free-flash-clock-175.swf width=200 height=200 wmode=transparent type=application/x-shockwave-flash></embed>


6. Black Clock


<embed src=http://flash-clocks.com/free-flash-clocks-blog-topics/free-flash-clock-179.swf width=200 height=200 wmode=transparent type=application/x-shockwave-flash></embed>


7. Clicking Out Digital Clock


<embed src=http://flash-clocks.com/free-flash-clocks-blog-topics/free-flash-clock-152.swf width=200 height=200 wmode=transparent type=application/x-shockwave-flash></embed>


8. 3D Clock


<embed src=http://flash-clocks.com/free-flash-clocks-blog-topics/free-flash-clock-169.swf width=200 height=200 wmode=transparent type=application/x-shockwave-flash></embed>


9. House Clock


<embed src=http://flash-clocks.com/free-flash-clocks-blog-topics/free-flash-clock-150.swf width=200 height=200 wmode=transparent type=application/x-shockwave-flash></embed>


10. Black Cool Clock


<embed src=http://flash-clocks.com/free-flash-clocks-blog-topics/free-flash-clock-165.swf width=200 height=200 wmode=transparent type=application/x-shockwave-flash></embed>


4. Now Click On Save 'JavaScript' You are done.


Special Thanks http://flash-clocks.com
Read more

0 Automatic category only Thumbnails


See the example above where screenshot of automatic category  only thumbnail. or you can view the demo below

The following is how you will modify the coding of your template to display the automatic category only with the thumbnail.


Step 1

  1. Login to blogger with your ID.
  2. Click Design.
  3. Click Edit HTML .
  4. Please backup your full template by clicking the Download Full Template link.
  5. Find the code ]]></b:skin>. Copy and paste the code below exactly above the code ]]></b:skin>
    /*** Labels Thumbs ***/
    img.label_thumb{
    float:left;
    border:1px solid #ccc;
    width:85px;
    height:70px;
    margin-right:10px;
    margin-bottom:10px;
    }
  6. Find the code </head>. Copy and paste the code below exactly above the code </head>
    <script type='text/javascript'>
    //<![CDATA[
    function labelthumbs(json){document.write('<div>');for(var i=0;i<numposts;i++){var entry=json.feed.entry[i];var posttitle=entry.title.$t;var posturl;if(i==json.feed.entry.length)break;for(var k=0;k<entry.link.length;k++){if(entry.link[k].rel=='replies'&&entry.link[k].type=='text/html'){var commenttext=entry.link[k].title;var commenturl=entry.link[k].href;}
    if(entry.link[k].rel=='alternate'){posturl=entry.link[k].href;break;}}
    var thumburl;try{thumburl=entry.media$thumbnail.url;}catch(error)
    {s=entry.content.$t;a=s.indexOf("<img");b=s.indexOf("src=\"",a);c=s.indexOf("\"",b+5);d=s.substr(b+5,c-b-5);if((a!=-1)&&(b!=-1)&&(c!=-1)&&(d!="")){thumburl=d;}
    else thumburl='';}
    document.write('<a href="'+posturl+'" title="'+posttitle+'"><img class="label_thumb" src="'+thumburl+'"/></a>');
    if(i!=(numposts-1))
    document.write('');}
    document.write('</div>');}
    //]]>
    
    </script>
  7. SAVE TEMPLATE.
  8. Step 1, done.

Step 2

  1. Click Page Element.
  2. Click Add a Gadget to add a new gadget.
  3. A new window will appear and click on the sign plus (+) for HTML/JavaScript
  4. Copy below script and then paste it into the available field. Give a title as you desire, but previously, you have to change the red-printed text into your own category (label).
    <script type='text/javascript'>var numposts = 6;</script>
    <script type="text/javascript" src="/feeds/posts/default/-/labelname?orderby=updated&alt=json-in-script&callback=labelthumbs"></script>
  5. Click SAVE
  6. Step 2, done.
If you want to add other widgets for other categories, repeat from the Step 2.
For custom settings such as the size of thumbnail, border, and others, you can set up at the CSS section. Just do your own creation.


/*** Labels Thumbs ***/
img.label_thumb{
float:left;
border:1px solid #ccc;
width:85px;
height:70px;
margin-right:10px;
margin-bottom:10px;
}
To set up the number of thumbnail to display, you only need to change the value 6 into another value.
<script type='text/javascript'>var numposts = 6;</script>
Well, displaying the automatic category with only thumbnail could best fit with a blog with the gallery template, photo gallery, etc. :r
Read more

0 Related Posts Widget for Blogger with Thumbnails

related posts with thumbnails for blogger 

Displaying the links to related posts along with a thumbnail of the corresponding post will help you increase the page views/user .Users will be tempted to go for the related posts when they are presented attractively with thumbnails.
This is another first release from me.This one also uses the media thumbnails generated by blogger for each post.
For displaying the thumbnails,this widget will use the images uploaded for the post using the blogger image uploader(from the post editor) [Update - Now supports external images also.]

Related Posts Widget with Thumbnails for Blogger

Here are the detailed steps to install the related posts widget for blogger with thumbnails
1.First of all Login to your blogger dashboard and navigate to Layout > Edit HTML and check the "Expand Widget Templates" check box
2.Now look for
</head>
 Now Replace it with


<!--Related Posts with thumbnails Scripts and Styles Start-->
<!-- remove --><b:if cond='data:blog.pageType == &quot;item&quot;'>
<style type="text/css">
#related-posts {
float:center;
text-transform:none;
height:100%;
min-height:100%;
padding-top:5px;
padding-left:5px;
}

#related-posts h2{
font-size: 1.6em;
font-weight: bold;
color: black;
font-family: Georgia, &#8220;Times New Roman&#8221;, Times, serif;
margin-bottom: 0.75em;
margin-top: 0em;
padding-top: 0em;
}
#related-posts a{
color:black;
}
#related-posts a:hover{
color:black;
}

#related-posts  a:hover {
background-color:#d4eaf2;
}
</style>
<script type='text/javascript'>
var defaultnoimage="https://blogger.googleusercontent.com/img/b/R29vZ2xl/AVvXsEiXVFKtKj8GmKaPPP56RtL0TjdXAin7Fo_tEb6NZpk3dfEJ9Nietj4Eanxvcd0BhzV-hvgY7FweYaHvho6S8-jqF-e5ILashnlKvNDZR2NsYHGfT65n6DnnBOYEMp_TzWoJnXsBX97_HFo/s400/noimage.png";
var maxresults=5;
var splittercolor="#d4eaf2";
var relatedpoststitle="Related Posts";
</script>
<script src='http://blogergadgets.googlecode.com/files/related-posts-with-thumbnails-for-blogger-pro.js' type='text/javascript'/>
<!-- remove --></b:if>
<!--Related Posts with thumbnails Scripts and Styles End-->
</head>
3.Now Find
<div class='post-footer-line post-footer-line-1'>
If you cant find it then try finding this one
<p class='post-footer-line post-footer-line-1'>
Now immediately after any of these lines(whichever you could find) place this code snippet 
<!-- Related Posts with Thumbnails Code Start-->
<!-- remove --><b:if cond='data:blog.pageType == &quot;item&quot;'>
<div id='related-posts'>
<b:loop values='data:post.labels' var='label'>
<b:if cond='data:label.isLast != &quot;true&quot;'>
</b:if>
<script expr:src='&quot;/feeds/posts/default/-/&quot; + data:label.name + &quot;?alt=json-in-script&amp;callback=related_results_labels_thumbs&amp;max-results=6&quot;' type='text/javascript'/></b:loop>
<script type='text/javascript'>
removeRelatedDuplicates_thumbs();
printRelatedLabels_thumbs(&quot;<data:post.url/>&quot;);
</script>
</div><div style='clear:both'/>
<!-- remove --></b:if>
<b:if cond='data:blog.url == data:blog.homepageUrl'><b:if cond='data:post.isFirstPost'>
<a href='http://www.bloggerplugins.org/2009/08/related-posts-thumbnails-blogger-widget.html'><img style="border: 0" alt="Related Posts Widget For Blogger with Thumbnails" src="http://image.bloggerplugins.org/blogger-widgets.png" /></a><a href='http://bloggertemplates.bloggerplugins.org/' ><img style="border: 0" alt="Blogger Templates" src="http://image.bloggerplugins.org/blogger-templates.png" /></a>
</b:if></b:if>
<!-- Related Posts with Thumbnails Code End-->
4.You can adjust the maximum number of related posts being displayed by editing this line in the code.
var maxresults=5;
5.To edit the title of the widget you can change this line of code
var relatedpoststitle="Related Posts";
6.To change the default thumbnail, you can edit this line of code
var defaultnoimage="https://blogger.googleusercontent.com/img/b/R29vZ2xl/AVvXsEiXVFKtKj8GmKaPPP56RtL0TjdXAin7Fo_tEb6NZpk3dfEJ9Nietj4Eanxvcd0BhzV-hvgY7FweYaHvho6S8-jqF-e5ILashnlKvNDZR2NsYHGfT65n6DnnBOYEMp_TzWoJnXsBX97_HFo/s400/noimage.png";
7.To Change the Colour of the Splitter Line , edit
var splittercolor="#d4eaf2";
To change the other colours and all you will have to modify the CSS
If you fall into troubles implementing this,don't panic..  :)  .just leave me a comment here and i will help you out. If you like to give me any suggestions on how to improve this widget,then it would be really great.

How to display the related posts on every page and not only on the post pages?

Just remove the two lines starting with <!-- remove --> from both step 3 and step 2.
that is lines

<!-- remove --><b:if cond='data:blog.pageType == &quot;item&quot;'> 
<!-- remove --></b:if>

Enjoy :r
Read more

0 How to make Facebook, Twitter, RSS, Feed with Tooltips JQuery in blogger


This time I will share with you how to add Facebook, Twitter, RSS, and subscribe via email. as you see the picture above.or you can view it directly on this blog.as seen interesting isnt it? :x :@


all the scripts and css I took from my own template, :r
Alright here we go...
  • Find this code ]]></b:skin>
  • Replace that code with the code below
/*** Tooltips ***/
#iconwrap{margin:5px 0 0 0; width:125px; height:38px; float:right;}
.facebooktooltip{margin:0; padding:0; width:16px; position:relative}
.facebooktooltip em{background:url(https://blogger.googleusercontent.com/img/b/R29vZ2xl/AVvXsEiPlCLZ48eONoYXfdYUSw_QHwZrz5yLiJd9GnhIDxy4pwHnEPOUSP3KX7ykIRj0dTYsKLkgR6IZDFYZvx8qXvVK93xLxbdgtRRcWe0brbFiEqo-PkDC7IMcCrotcBciW-TWtrqswCyDokI/) no-repeat; width:100px; height:30px; position:absolute; top:-60px; left:-27px; text-align:center; text-indent:-9999px; z-index:2; display:none}
#facebook-icon{width:25px; height:24px; background:url(https://blogger.googleusercontent.com/img/b/R29vZ2xl/AVvXsEi7OoSkIn8e4eZmTvtTc6UUJl9ie5O7DAvkKOHKMzQiHc20Xivo1ZRTl0zNHmkVmMaYYwh3uZXUcpG2jF-OOIc7dp719VsPjIMCvvrAUgEC5tTkVpeo0XZFG_psr73MEXAwV33y45D5WWU0/) no-repeat 0 0; text-indent:-9999px; margin:0 5px 0 0; display:block; opacity:0.85; left:0px; position:absolute;}
#facebook-icon:hover{opacity:1.0}
.twittertooltip{margin:0; padding:0; width:100px; position:relative}
.twittertooltip em{background:url(https://blogger.googleusercontent.com/img/b/R29vZ2xl/AVvXsEiXh2j_gfktYDiuiCSv0h5Bt9zdWE4YX4gf2_JDoyxxOYylnJ1kyEMMUGio_FUFth_pS_9p9SDMsoD5W2idetllmGDFJEapSomskXqdsEEkXt2Ze-Q-DEmXSeKNWRuVVE6Ov-0nnq3va4AM/) no-repeat; width:100px; height:30px; position:absolute; top:-60px; left:8px; text-align:center; text-indent:-9999px; z-index:2; display:none;}
#twitter-icon{width:25px; height:24px; background:url(https://blogger.googleusercontent.com/img/b/R29vZ2xl/AVvXsEjC1BDEAdIOyyOAXznI1pa6wv34Zzg2Iai2Lb5oGNdx5hvCCf4VJ6GQPC0O30ohOzBMPbiX0-ZZpBQ2LHeRplx9icpSkxmMeQqM6nLFrEFfPS_jAbcWkmMCJD58KhfCZZxdKvF17C77rdl1/) no-repeat 0 0; text-indent:-9999px; margin:0; display:block; opacity:0.85; left:30px; position:absolute;}
#twitter-icon:hover{opacity:1.0}
.rsstooltip{margin:0; padding:0; width:300px; position:relative}
.rsstooltip em{background:url(https://blogger.googleusercontent.com/img/b/R29vZ2xl/AVvXsEh8y5dKpvcJnwGbpVrDqAIY7cTvrBqqnO7Mxc-hrwo06hbu65jmqJSXp3ZwaxQX9ip9ImM8stz_LPNYs-zTEYbETcc0lGghGkyMZz_Gmbmz1yWqzqkhgVF0bDJjL9zq6ZGeT-fC5rjE2oY/) no-repeat; width:100px; height:30px; position:absolute; top:-60px; left:38px; text-align:center; text-indent:-9999px; z-index:2; display:none}
#rss-icon{width: 25px;height: 24px;background: url(https://blogger.googleusercontent.com/img/b/R29vZ2xl/AVvXsEi7LJexqt0y86tDgsL1haOxOFceP6HxRduA5CXSPyjQxMQ5v_EA7dQzNq-Ca3FR32C1cezARkXoSy1ijEoiBMO_K__10b4ebkiVIJwmT_YCS7pg9lkjAevUiaouZ_h5Kr4twDBs1u8YJxX8/) no-repeat 0 0;text-indent: -9999px;margin: 0 10px;display: block;opacity: 0.85;left:50px;position:absolute;}
#rss-icon:hover{opacity: 1.0}
.emailtooltip{margin:0;padding:0;width:300px;position:relative}
.emailtooltip em{background: url(https://blogger.googleusercontent.com/img/b/R29vZ2xl/AVvXsEhKI-zzUlJ0qll27Nm7fIMiliNpN9OfIIvoLFGwUTPK_fthgTXAcYggC3p6AWNuK2Jjxg3XinKy969bOqUTQgjvbY-9OXymcPYPbHOeBvi1wDVvQAPisRPCN4a4GWMwcYEmX0O3hcCeTrs/) no-repeat;width:100px;height:30px;position:absolute;top:-60px;left:68px;text-align:center;text-indent:-9999px;z-index:2;display:none;}
#email-icon{width: 25px;height: 24px;background: url(https://blogger.googleusercontent.com/img/b/R29vZ2xl/AVvXsEgCDAxdPsW75qOiLBeZlR9Pz5eFRl7Jtag9TV2eDehWq_gwAaZyLXYQBt15Jx9x5ChH0-vR4Dwo0SoSBsNjIe59yTy089Kncj7q81BkJYdF6EaX3EfspD4RKidD_16jrrMJzfVqygNLU9PY/) no-repeat 0 0;text-indent:-9999px;margin: 0 10px;display: block;opacity: 0.85;left:80px;position:absolute;}
#email-icon:hover{opacity: 1.0}
.status-msg-wrap{width:99%;margin-top:0}
.status-msg-border{border:1px solid #C9C7C7}

]]></b:skin> 


  • go to your Dashboard
  • then go to Design ► Edit HTML
  • Then find </body>
  • and Replace kode </body> with code below

<!-- jQuery -->
<script src='http://jancok.googlecode.com/files/jquery.minUser.js' type='text/javascript'/>

<!-- begin Tooltips -->
<script type='text/javascript'>
var $j = jQuery.noConflict();
$j(document).ready(function(){$j(&quot;.rsstooltip a&quot;).hover(function()
{$j(this).next(&quot;em&quot;).stop(true, true).animate({opacity: &quot;show&quot;, top: &quot;-35&quot;}, &quot;slow&quot;);}, function() {$j(this).next(&quot;em&quot;).animate({opacity: &quot;hide&quot;, top: &quot;-30&quot;}, &quot;fast&quot;);});});$j(document).ready(function(){$j(&quot;.facebooktooltip a&quot;).hover(function() {$j(this).next(&quot;em&quot;).stop(true, true).animate({opacity: &quot;show&quot;, top: &quot;-35&quot;}, &quot;slow&quot;);}, function() {$j(this).next(&quot;em&quot;).animate({opacity: &quot;hide&quot;, top: &quot;-30&quot;}, &quot;fast&quot;);});});$j(document).ready(function(){$j(&quot;.twittertooltip a&quot;).hover(function(){$j(this).next(&quot;em&quot;).stop(true, true).animate({opacity: &quot;show&quot;, top: &quot;-35&quot;}, &quot;slow&quot;);}, function() {$j(this).next(&quot;em&quot;).animate({opacity: &quot;hide&quot;, top: &quot;-30&quot;}, &quot;fast&quot;);});});$j(document).ready(function(){$j(&quot;.emailtooltip a&quot;).hover(function() {$j(this).next(&quot;em&quot;).stop(true, true).animate({opacity: &quot;show&quot;, top: &quot;-35&quot;}, &quot;slow&quot;);}, function() {$j(this).next(&quot;em&quot;).animate({opacity: &quot;hide&quot;, top: &quot;-30&quot;}, &quot;fast&quot;);});});
</script>

</body>

  • Save your Template 
  • Now go to Page Elements
  • Add Gadget ► HTML/JavaScript
  • Leave the title empty, and in the content area paste the following code.

<div id='iconwrap'>
<div class='facebooktooltip'>
<a href='http://www.facebook.com/pages/Blogger-Tutorialz/110157202393121' id='facebook-icon'/>
<em>Join our community on Facebook</em>
</div>
<div class='twittertooltip'>

<a href='http://twitter.com/bendol212' id='twitter-icon'/>
<em>Follow my Twitter</em>
</div>
<div class='rsstooltip'>
<a href='http://feeds.feedburner.com/blogger-tutorialz' id='rss-icon'/>
<em>RSS</em>
</div>
<div class='emailtooltip'>
<a href='http://feedburner.google.com/fb/a/mailverify?uri=blogger-tutorialz' id='email-icon'/>
<em>RSS</em>
</div>
</div>

  • I've marked you need to replace by your own :D
  • I guess you already know that I mark :r (if you do not know please ask in the comment box below) easy :r :r 
  • After you replace the Blue, cyan, and Red please save your widget
  • And see your blog :)


hmm...I think your blog looks more professional now, do you agree? ya ya ya...i know Enjoy :c :p

    Read more

    0 Insert the “Like” Button on your post Blog

    In this post we will discuss how to install the “like” button on your blog post.
    The advantage like button  in your blog post is the reader can easily share a post that they like to their friends facebook with just one click.
    You also get the benefits of additional traffic from readers who click your article in your facebook profile.

    For those of you who are interested in installing the “like” button, please follow these steps:
    1.  Open http://www.blogger.com site and sign in with your ID.
    2.  Click the Design menu  then select Edit HTML
    3.  Please tick “expand widget templates”
    4.  Find out <data:post.body/> code
    If you find two <data:post.body/> code, then select first code.
    If you want to install the “like” button below the post, put the following code below <data:post.body/>.
    When you want to install the “like” button above the post, put the following code above <data:post.body/>

    <iframe expr:src='&quot;http://www.facebook.com/plugins/like.php?href=&quot; + data:post.url + &quot;&amp;action=like&amp;layout=standard&amp;show_faces=false&amp;width=450&amp;font=arial&amp;colorscheme=light&quot;' allowTransparency='true' frameborder='0' scrolling='no' style='border:none; overflow:hidden; width:450px; height:25px;'/>


    code


    the view result will be like:
     

    5. If you want to create another type “Like” button like, as below:


    In the code above, please replace word standard with button count.

    Happy Blogging :D
    Read more

    0 Adding FaceBook Share button for blogger posts

    Adding FaceBook Share button for blogger posts.

    This is the official facebook sharing button and here are it’s features.
    • 2 Styles. Button Or Link
    • With / without Counter.
    1. Get Your Code
    • Go to this page click here,
    • And make your button ( customize it ). there are some easy options and you can check the preview button to see your button.
      See the following image to see the button different styles.
    Adding FaceBook Share button for blogger posts.
    • After Finish you button customization, please copy your button code and go to the next step.

    2. Add It To Your Blogger Blog.
    • Log into your blogger account
    • and go to Design ► Edit HTML
    • check Expand Widget Templates box.
    • And find the next Code 
    <div class='post-header-line-1'/>
    • paste your button code we made the button it in step 1
    • If you didn’t find the code above in your template, Then try to find the following
    <data:post.body/>
    • And paste the button code Before it.
    • GL :)
    Read more

    0 Google Translate Flags Widget For Blogger

    Google Translate Flags Widget For Blogger 

    I’m sure that we are all not from the same country, and we all can’t read and understand all languages in the world, and as a blogger my self, sometimes i want to translate some blogs from various languages to English. The usual way is to copy the page url and then i go to google translate service and paste the url there then hit enter.
    We can all short cut all this steps for our visitors by adding a great widget to our blog. it’s easy and one step trick.
    This widget is a great one and the best translate widget ever and here are the features.
    • This Widget Auto detect your blog language and translate it to the readers chosen language.
    • Support 12 different languages, English, French, Germany, Spanish, Italian, Dutch, Brazilian, Russian, Japanese, Korean, Arabic And Chinese.
    • Auto Adjustment, No matter where do you add this widget, it’ll be auto adjusted with your blog template.
    widget to our blog. it’s easy and one step trick.

    Here we go...
    • Go to your Blogger Dashboard ► Design ► Page Elements
    • Click Add A Gadget and choose HTML/JavaScript  
    • Leave the title empty or type any title for your widget, and in the content area paste the following code.
    <style>

     .google_translate img {
            filter:alpha(opacity=100);
            -moz-opacity: 1.0;
            opacity: 1.0;
            border:0;
            }
            .google_translate:hover img {
            filter:alpha(opacity=30);
            -moz-opacity: 0.30;
            opacity: 0.30;
            border:0;
            }
            .google_translatextra:hover img {
            filter:alpha(opacity=0.30);
            -moz-opacity: 0.30;
            opacity: 0.30;
            border:0;
            }
      </style>

     <div>

     <a class="google_translate" href="#" target="_blank" rel="nofollow" title="English" onclick="window.open('http://translate.google.com/translate?u='+encodeURIComponent(location.href)+'&langpair=auto%7Cen&hl=en'); return false;"><img alt="English" border="0" align="absbottom" title="English" height="24" src="https://blogger.googleusercontent.com/img/b/R29vZ2xl/AVvXsEhZohSHeJOgtN2Iww81Rl8bMZIse82mj4QJPSSRn2Sfg5lRUrmjjNY6eYyRud8W5b9BZ1EKRUc_tN4qxJhm1eZ_WiCZQaRPJ06uUAdHvP0NkvGEZSkQTXRpOXtUWn4Gt70siBytWyKNjJE/s200/United+Kingdom(Great+Britain).png" style="cursor: pointer;margin-right:8px" width="24"/></a>

     <a class="google_translate" href="#" target="_blank" rel="nofollow" title="French" onclick="window.open('http://translate.google.com/translate?u='+encodeURIComponent(location.href)+'&langpair=auto%7Cfr&hl=en'); return false;"><img alt="French" border="0" align="absbottom" title="French" height="24" src="https://blogger.googleusercontent.com/img/b/R29vZ2xl/AVvXsEhuNBeGkOECEr6Fk66sCp5tkc2map6_fi4wo6tN7_PD5MSaK7qdWYXSzPtckXxpIwxWB5Zvm3pM9ciPUlU2YvWN_YTNlwhDu2scdipyE3xaT0yNApffZZDuTBFDRa34XqBCnBbhlSewr6A/s200/France.png" style="cursor: pointer;margin-right:8px" width="24"/></a>

     <a class="google_translate" href="#" target="_blank" rel="nofollow" title="German" onclick="window.open('http://translate.google.com/translate?u='+encodeURIComponent(location.href)+'&langpair=auto%7Cde&hl=en'); return false;"><img alt="German" border="0" align="absbottom" title="German" height="24" src="https://blogger.googleusercontent.com/img/b/R29vZ2xl/AVvXsEhg1UPrT7nIL6dHHVOTyjOvSjopXTTjQ43fTfJrNcYnBbazCVrWeparZlaXep1R9t9NrgzRJMMtAC-zfIiyhdvwqAG0iYPDFHkMXw25lxtPL8P4QIU1PT0p3ldIY9AutEJ_VQl6o_yKcbA/s200/Germany.png" style="cursor: pointer;margin-right:8px" width="24"/></a>

     <a class="google_translate" href="#" target="_blank" rel="nofollow" title="Spain" onclick="window.open('http://translate.google.com/translate?u='+encodeURIComponent(location.href)+'&langpair=auto%7Ces&hl=en'); return false;"><img alt="Spain" border="0" align="absbottom" title="Spain" height="24" src="https://blogger.googleusercontent.com/img/b/R29vZ2xl/AVvXsEirfMI0TVX0FFYOdCFL3GYNZE41cfMQGs5FIQuz_9ImN1VPwxoF_T5wRFXn9efXPFnWvCNhqo6xICkCisLTsTMH23QBFgkW3uAZE3DKcgymdMJVJ7t4f5yKb4lp7rHA4o4VVFFm99Yosm4/s200/Spain.png" style="cursor: pointer;margin-right:8px" width="24"/></a>

     <a class="google_translate" href="#" target="_blank" rel="nofollow" title="Italian" onclick="window.open('http://translate.google.com/translate?u='+encodeURIComponent(location.href)+'&langpair=auto%7Cit&hl=en'); return false;"><img alt="Italian" border="0" align="absbottom" title="Italian" height="24" src="https://blogger.googleusercontent.com/img/b/R29vZ2xl/AVvXsEhr4jHkOrN8aafcbxDqIt6Ux67vYbkX7dtKNfMVuSSxdaj9Bx4nCu6aslsAkEiktHkVnOApbUSKp38QUNCRFFEknSa46W_AT37vxFyfuMHark2NL5j08CCMHeBU6y8tQadtE5rud8IELOY/s200/Italy.png" style="cursor: pointer;margin-right:8px" width="24"/></a>

     <a class="google_translate" href="#" target="_blank" rel="nofollow" title="Dutch" onclick="window.open('http://translate.google.com/translate?u='+encodeURIComponent(location.href)+'&langpair=auto%7Cnl&hl=en'); return false;"><img alt="Dutch" border="0" align="absbottom" title="Dutch" height="24" src="https://blogger.googleusercontent.com/img/b/R29vZ2xl/AVvXsEhHi3-An6cC-o8D2YptNvj2Bx2f3JWACxFyHcA_B46STMEuiWB7aO7QjJ9MkZOafx9bOMB7Fs1HWpD4gae50mpOoTIL3bYUwaTfN-L2AYPGJVeyZZcclyi2W7vPchbyZw51HEJRC45qfiI/s200/Netherlands.png" style="cursor: pointer;margin-right:8px" width="24"/></a>
          <a class="google_translate" href="#" target="_blank" rel="nofollow" title="Russian" onclick="window.open('http://translate.google.com/translate?u='+encodeURIComponent(location.href)+'&langpair=auto%7Cru&hl=en'); return false;"><img alt="Russian" border="0" align="absbottom" title="Russian" height="24" src="https://blogger.googleusercontent.com/img/b/R29vZ2xl/AVvXsEgnzIHr-ahpigCojzwINSyISVqsbE4riUFM08yjOIIn9Q42Xefcc00AR1OrAnOO4jo6t94dtXz7GI3SOgrDuPyMnPaCB80nKl4ervclTXOJcv8ZXIXXTDQmfU5WCvPzIc8Vtm_s6IG0UbY/s200/Russian+Federation.png" style="cursor: pointer;margin-right:8px" width="24"/></a>

     <a class="google_translate" href="#" target="_blank" rel="nofollow" title="Portuguese" onclick="window.open('http://translate.google.com/translate?u='+encodeURIComponent(location.href)+'&langpair=auto%7Cpt&hl=en'); return false;"><img alt="Portuguese" border="0" align="absbottom" title="Portuguese" height="24" src="https://blogger.googleusercontent.com/img/b/R29vZ2xl/AVvXsEhTI3XUSZCA0GUPbI_R2nYqCryZu8OAEgZd9bcXdaPVGlmAiqtoIg4rzXk4FIKpFuSPCxnehf_VFCPWy83DHwVb79kHNkeyy9gJ-2Y_jk1IpcoMHM5GuCCL5kBbstK4DesDKmexhlJiAx4/s200/Brazil.png" style="cursor: pointer;margin-right:8px" width="24"/></a>

     <a class="google_translate" href="#" target="_blank" rel="nofollow" title="Japanese" onclick="window.open('http://translate.google.com/translate?u='+encodeURIComponent(location.href)+'&langpair=auto%7Cja&hl=en'); return false;"><img alt="Japanese" border="0" align="absbottom" title="Japanese" height="24" src="https://blogger.googleusercontent.com/img/b/R29vZ2xl/AVvXsEgQw_u1HT0mWSSpKMPkmChpIJD3u5c6WTinAHlhv-cROfuNRdMvz2uB_ufa80ulmayP792juK-z4o8sBrnh2JAQ7VwjTd_4B71qHRQl3ZgOw_slTU3sTztUqmSqPw_5PDjxZkCL4r-4Yrc/s200/Japan.png" style="cursor: pointer;margin-right:8px" width="24"/></a>

     <a class="google_translate" href="#" target="_blank" rel="nofollow" title="Korean" onclick="window.open('http://translate.google.com/translate?u='+encodeURIComponent(location.href)+'&langpair=auto%7Cko&hl=en'); return false;"><img alt="Korean" border="0" align="absbottom" title="Korean" height="24" src="https://blogger.googleusercontent.com/img/b/R29vZ2xl/AVvXsEgScekwzB15eaj3Pe4s_o38A6lHz61icKuysfgIlGoG9ROkDWyZq9t1ZYGRSN5D4MfQxSVDGLbA6Q-IauHj1x4Bx9JY_QSkS-0BytegAbJ7F4PcZFelc7ucwZtJtpjk2EexiQr8tAuDbRY/s200/South+Korea.png" style="cursor: pointer;margin-right:8px" width="24"/></a>

     <a class="google_translate" href="#" target="_blank" rel="nofollow" title="Arabic" onclick="window.open('http://translate.google.com/translate?u='+encodeURIComponent(location.href)+'&langpair=auto%7Car&hl=en'); return false;"><img alt="Arabic" border="0" align="absbottom" title="Arabic" height="24" src="https://blogger.googleusercontent.com/img/b/R29vZ2xl/AVvXsEh6HIqjLZqWcmAz1GP5a0aq8Zwhc_eZfy3QrV69Wzsv3_8txuNGrtHiiNVF6iNRyVLsJEJHvILJtW-SvDGymelDTV0icuemkXNc351kRP4Hjp-3xoZ8r64EXFaNjCCsUzDxreLPxS9JCWE/s200/Saudi+Arabia.png" style="cursor: pointer;margin-right:8px" width="24"/></a>

     <a class="google_translate" href="#" target="_blank" rel="nofollow" title="Chinese Simplified" onclick="window.open('http://translate.google.com/translate?u='+encodeURIComponent(location.href)+'&langpair=auto%7Czh-CN&hl=en'); return false;"><img alt="Chinese Simplified" border="0" align="absbottom" title="Chinese Simplified" height="24" src="https://blogger.googleusercontent.com/img/b/R29vZ2xl/AVvXsEjB-7Fu9dh1_UJe_lYH81k0hz_O8xkZ0ztfS5vOdBzW0BjSV7OLCFLxsx7GvvRqYcnKlZekkam4fXnYtQ72ELc-k9p57U8KVNjNSfIa88yDf8Zxx6I7WItxGWpiuYUafGv2S2bH-OGymZs/s200/China.png" style="cursor: pointer;margin-right:8px" width="24"/></a>      </div>
      <div 0px 0pxâ?? style="â??font-size:10px;margin:8px" 3px></div>

     <br/>
            <a href="http://blogger-tutorialz.blogspot.com/"taregt=_blank"><font size="1px">this widget by Blogger-Tutorialz</font></a
    • And click Save 
    • The check your blog. 
    Read more

    0 Making TabView with jQueryLibrary


    If you search from Google you will found many way to make Tabbed Sidebar but Difficult to implement in blogger, because we have to modify HTML or XML in Sidebar Part. This Trick is very easy only put CSS and JS. The JS will automatic make structure for Tabbed and we don’t have to modify in Sidebar Part.
    So this trick will not mess up you html and disturb your sidebar. After put js You can change position or content of sidebar, it was very easy.
    Here are some features of my method:
    • Easy to install.
    • No need edit html in Sidebar part.
    • Automatically place your handpicked widgets inside tabs.
    • Freedom to set what widgets stay out of the tabs.
    • After implementing, Widgets are normally edited from Page Elements section. 
     So how do I make it? easy... :)
    • Find this code ]]></b:skin>
    • replace with the code below
    /* Tabbed Sidebar Widgets
    --------------------------------- */
    .widget-wrapper2{
    border:1px solid #494e52;
    background-color:#636d76;
    padding:8px;
    }

    .widget-tab {
    -moz-border-radius-bottomleft:5px;
    -moz-border-radius-bottomright:5px;
    -moz-border-radius-topright:5px;
    -webkit-border-radius-bottomleft:5px;
    -webkit-border-radius-bottomright:5px;
    -webkit-border-radius-topright:5px;
    background:#FFFFFF url(http://i195.photobucket.com/albums/z105/dantearaujo/tabcontentbg.gif) repeat-x scroll left bottom !important;
    border:1px solid #CFCFCF;
    font-family:Arial,Helvetica,sans-serif;
    padding:15px !important;
    }

    .widget-tab  ul {
    margin:0px;
    padding:0px 20px 0px 20px;
    }
    .widget-tab  ul li {
    list-style:none;
    border-bottom:1px solid #d6dde0;
    padding-top:10px;
    padding-bottom:10px;
    font-size:13px;
    }
    .widget-tab  ul li:last-child {
    border-bottom:none;
    }
    .widget-tab  ul li a {
    text-decoration:none;
    color:#3e4346;
    }
    .widget-tab  ul li a small {
    color:#8b959c;
    font-size:9px;
    text-transform:uppercase;
    font-family:Verdana, Arial, Helvetica, sans-serif;
    position:relative;
    left:4px;
    top:0px;
    }
    .tab-content  ul li a:hover {
    color:#a59c83;
    }
    .tab-content  ul li a:hover small {
    color:#baae8e;
    }

    .active-tab{
    background:#FFFFFF url(http://i195.photobucket.com/albums/z105/dantearaujo/tabtopbg.gif) repeat-x scroll left top !important;
    border-color:#CFCFCF #CFCFCF #FFFFFF #CFCFCF !important;
    border-style:solid !important;
    border-width:1px 1px 2px !important;
    color:#282E32 !important;       

    }

    ul.tab-wrapper {
    margin:0px; padding:0px;
    margin-top:5px;
    margin-bottom:6px;
    }
    ul.tab-wrapper li {
    -webkit-border-radius-topleft:5px;
    -webkit-border-radius-topright:5px;
    -moz-border-radius-topleft:5px;
    -moz-border-radius-topright:5px;
    background:#191919 url(http://i195.photobucket.com/albums/z105/dantearaujo/tabinactivebg.gif) repeat-x scroll left top;
    border:1px solid #464C54;
    color:#FFFFFF;
    cursor:pointer;
    display:inline;
    font-family:Verdana,Arial,Helvetica,sans-serif;
    font-size:9px;
    font-weight:bold;
    line-height:2em;
    list-style-image:none !important;
    list-style-position:outside !important;
    list-style-type:none !important;
    margin-right:1px;
    padding:8px 14px;
    text-align:center;
    text-decoration:none;
    text-transform:uppercase;
    }
    ]]></b:skin>
    • This script needs the jQuery JavaScript library, if you already have it installed, you can skip this step, if you don’t just paste the code below right before your </head> line:

    <!-- jQuery Call -->

    <script src='http://ajax.googleapis.com/ajax/libs/jquery/1.2.6/jquery.min.js' type='text/javascript'/>

    <!-- End of jQuery Call -->
    • Ok now that you’ve made sure that you have jQuery installed, you need to install the script that will do all the magic for us, just place the following code right before your </head> line

    <script type="text/javascript">
    var starttab=0;
    var endtab=2;
    var sidebarname="sidebar1";
    </script>
    <script type="text/javascript" src="http://scriptabufarhan.googlecode.com/svn/trunk/bloggertabv1.0-min.js"></script>
    • Customizing

    As you have noted you’ll get a few lines that can be customized, those are:
    var starttab=0;
    var endtab=2;
    var sidebarname="sidebar";

    Very quickly: starttab is the starting number for your chosen widgets, it starts counting from 0. endtab is the number for your last included widget. sidebarname is your sidebar’s id, it is generally just “sidebar”, but just in case you have a different id, we’ll help you finding the right one to place here.
    • How to find your sidebar’s ID

    Ok if you have installed the script and it is not working, you may have a different sidebar ID that is not only “sidebar”, use the following methods to find he right id of your sidebar.
    • Method 1 – Getting from the HTML

    This one may be the fastest one, if you use Minima template, or any template derived from it, just go to Layout > Edit HTML > Search for “sidebar-wrapper” and you may get something like this:

    <div id='sidebar-wrapper'>

    <b:section class='sidebar' id='sidebar' preferred='yes'>
    Just take a closer look and you will find it id=’sidebar’.

    What are the Gadget Numbers

    Here is a simple explanation for those who haven’t understand the numbers yet. Let’s say that you want make tabs out of your first 3 widgets, so your starting number will be 0 and your finishing number will be 2:
    var starttab=0;
    var endtab=2;
    var sidebarname="sidebar";

    Check images below for better understanding:
    image
    image
    In this case, Widget 3 and 4 will not get any tabs, because your finishing number was 2. Very easy huh?

    Advices

    • This script works for only one sidebar per blog.
    • We have included a general styles for your tabs, however, you can use your CSS skills to customize them, but be aware that CSS related errors will not be supported here, make sure you do the right thing.
    • All the tabbed widgets need to have a title.
    Read more

    Delete this element to display blogger navbar

     
    Google Pagerank Powered by  MyPagerank.Net
    © Blogspot Tutorialz | Design by Blog template in collaboration with Concert Tickets, and Menopause symptoms
    Powered by Blogger